Can You Replace Ridge Caps Without a Full Roof Replacement?

Yes, you can replace just ridge cap shingles without undertaking a complete roof replacement. This targeted repair approach often provides an effective solution for homeowners dealing with damaged or worn ridge caps while the rest of their roofing system remains in good condition.
Ridge cap shingles serve as the protective barrier along your roof’s peak, where roof planes meet at the highest point. These specialized shingles endure more severe weather exposure than standard roofing materials, making them particularly vulnerable to wind damage, UV deterioration, and general wear. The ridge cap shingle replacement process typically becomes necessary when these components show signs of cracking, lifting, or missing sections, even when the underlying roof structure and field shingles remain intact.
Understanding when ridge cap replacement represents the right solution versus needing a full roof overhaul depends on several key factors. Replacing damaged ridge cap shingles can extend your roof’s lifespan and prevent leaks that could lead to more extensive problems. This approach proves especially valuable when ridge vents require updating or when storm damage affects only the roof’s peak area.
Assessing Your Ridge Cap Shingles for Replacement Needs
Before beginning any ridge cap shingle replacement process, conducting a thorough assessment determines whether the targeted replacement will solve the problem effectively. Professional inspection reveals the extent of damage and helps identify underlying issues that might affect the success of replacing damaged ridge cap shingles.
Visual inspection from ground level can reveal obvious problems, such as missing or severely damaged ridge caps, but closer examination identifies subtle signs of deterioration. Look for granule loss, which appears as bare or discolored spots on the shingle surface. Cracking, curling edges, and loose or lifted sections indicate weathering damage that compromises the ridge cap’s protective function. Check for gaps between ridge caps where wind-driven rain could get in.
Compatibility between new ridge caps and existing roofing materials affects both performance and appearance. The replacement shingles must match the thickness and profile of the current field shingles to ensure proper overlap and weather sealing. Color matching becomes important for maintaining your roof’s curb appeal, though perfect matches may not always be available for older roofing systems.
Structural considerations include examining the condition of ridge boards and underlying decking. If ridge vent installation accompanies the replacement, ensuring adequate ventilation space and proper airflow becomes critical for the roof ridge repair methods to succeed long-term.
Essential Tools and Materials for Ridge Cap Shingle Replacement
Proper equipment and materials are critical for successful ridge cap shingle replacement. Safety gear forms the foundation of any roofing project, requiring non-slip footwear, safety harnesses, and properly positioned ladders. Essential removal tools include a pry bar for lifting damaged shingles, a roofing hammer for nail extraction, and a utility knife for cutting away old materials. Installation hardware encompasses roofing nails specifically designed for ridge applications, typically longer than standard shingle nails to fasten them through multiple layers.
Measuring instruments such as chalk lines and tape measures ensure accurate placement during the ridge cap shingle replacement process. A roofing square helps maintain proper angles and alignment along the roof peak. Weather conditions in areas like Buffalo make timing crucial, so having tarps available protects exposed areas during installation.
Selecting appropriate ridge cap shingles requires matching both the material composition and architectural style of existing roofing. Hip and ridge shingles designed specifically for peak applications offer superior wind resistance compared to modified field shingles. Supplementary materials include roofing cement for sealing connections, ice and water shield for enhanced protection, and compatible underlayment. Quality roofing nails with proper length and corrosion resistance prevent future failures when replacing damaged ridge cap shingles.
Step-by-Step Ridge Cap Shingle Removal Process
Removing old ridge cap shingles requires careful technique to protect surrounding roofing materials while ensuring complete debris elimination. The ridge cap shingle replacement process begins with removing damaged materials systematically, working from one end of the ridge line toward the other to maintain consistent access and safety.
Start by lifting each ridge cap shingle gently with a pry bar, locating the nails that secure it to the roof deck. Most ridge caps use 4 to 6 nails per shingle, positioned to go through the underlying field shingles. Extract nails completely rather than driving them deeper, as remaining nail heads can puncture new shingles during installation. When replacing damaged ridge cap shingles, preserve any salvageable materials that might be needed for repairs elsewhere on the roof.
Proper debris management prevents materials from sliding off the roof and causing property damage or injury. Use a debris container positioned safely below the work area, and remove accumulated materials frequently to maintain clear working conditions. Once removal is complete, preparing the ridge line surface becomes essential for successful installation.
Clean the exposed ridge area thoroughly, removing any remaining adhesive, old roofing cement, or debris that could interfere with proper sealing. Inspect the underlying roof structure for damage, checking ridge boards for rot or deterioration, and examining field shingles for tears or punctures. Address any discovered issues before proceeding with new ridge cap installation to ensure the roof ridge repair methods provide lasting protection.
Installing New Ridge Cap Shingles Properly
Proper installation techniques ensure that new ridge cap shingles provide effective weather protection and long-term durability. The ridge cap shingle replacement process requires precise placement and secure fastening methods that account for thermal expansion and severe weather conditions.
Begin installation from the end opposite prevailing winds to prevent wind-driven rain from getting beneath the ridge caps. Each shingle should overlap the previous one by approximately 5 inches, creating a continuous barrier along the entire ridge line. Position nails 2 inches from each edge and 1 inch from the top edge of each shingle, ensuring the fasteners go through the ridge cap, field shingles, and into the roof deck by at least ¾ of an inch.
Maintaining straight alignment requires establishing a chalk line reference along the ridge before installation begins. This guideline ensures consistent placement when replacing damaged ridge cap shingles and creates a professional appearance. Check alignment frequently during installation, making minor adjustments as needed to accommodate slight variations in the roof structure.
Effective sealing techniques prevent leaks at vulnerable connection points throughout the ridge line. Apply a small amount of roofing cement beneath each ridge cap before final positioning, focusing on areas where gaps might develop. After securing each shingle with nails, inspect all edges and joints for proper contact with adjacent materials. Additional roofing cement may be necessary at transition points where ridges meet hips or where ridge vents connect to standard ridge caps, ensuring water-tight connections that protect the underlying roof structure from moisture damage.
Integrating Ridge Vents During Ridge Cap Replacement
Ridge vent installation or replacement during ridge cap projects requires careful evaluation to determine whether enhanced ventilation benefits justify the additional work involved. Proper roof ventilation prevents moisture buildup and reduces energy costs, making ridge vent integration particularly valuable when replacing damaged ridge cap shingles on older roofing systems lacking adequate airflow.
Cutting ventilation openings along the ridge line requires precision to maintain roof structural integrity while creating adequate airflow channels. The ridge cap shingle replacement process provides an ideal opportunity to install ridge vents since the ridge line is already exposed and accessible. Standard ridge vent openings typically measure 2 inches wide, centered along the ridge peak, though specific requirements vary based on roof size and existing ventilation configuration.
Installation procedures for ridge vents with new ridge caps require coordinating ventilation components with roofing materials to prevent leaks. Proper spacing between ridge vent sections maintains continuous airflow while allowing secure attachment points for ridge cap shingles. Most ridge vent systems integrate seamlessly with standard roofing materials, using specialized ridge caps designed to cover ventilation openings while preserving weather protection.
Securing methods include mechanical fasteners that go through vent materials into the roof deck, combined with weatherproof sealants at all connection points. Maintaining adequate ventilation while preventing leaks requires careful attention to manufacturer specifications and proper overlap techniques where ridge vents meet standard ridge sections throughout the roof ridge repair methods implementation.
Ensuring Long-Term Performance and When to Call Professionals
Completing a thorough quality control inspection after ridge cap shingle replacement ensures proper installation and identifies any issues requiring immediate attention. Check each ridge cap for secure nail placement, proper overlap, and complete weather sealing along the entire ridge line. Verify that all roofing cement applications create watertight seals without excess material that could trap debris or create drainage problems.
Testing the installation involves examining the ridge caps from multiple angles to confirm straight alignment and consistent spacing. Look for any lifted edges, gaps between shingles, or exposed nail heads that compromise weather protection. When ridge vent installation accompanies the replacement, verify adequate airflow and proper integration with surrounding ridge caps.
Professional roofing contractor expertise becomes necessary when structural issues emerge during inspection or when safety concerns exceed the homeowner’s capabilities. Complex roof configurations, significant structural damage, or warranty requirements often mandate professional installation. Recognizing these limitations prevents inadequate repairs that could lead to more extensive problems.
Steep roof pitches, multiple ridge intersections, or integration with existing roofing systems may require specialized experience and equipment beyond typical DIY capabilities. Professional contractors possess the expertise to address unexpected complications and ensure compliance with local building codes, making their involvement essential for complex roof ridge repair methods that exceed standard ridge cap shingle replacement process requirements.
Secure Your Roof’s Peak with OConnor Contracting
If you’ve noticed signs of wear on your ridge cap shingles, such as cracking, curling, or granule loss, you may not need a full roof replacement. OConnor Contracting specializes in ridge cap shingle replacement, ensuring your roof remains in peak condition without the extensive cost of a complete overhaul. By focusing solely on replacing the ridge caps, you can extend the life of your roof significantly, maintaining its integrity and protective capabilities.
Don’t wait for minor issues to lead to major damage. Call OConnor Contracting today at (716) 600-7663 to assess your ridge cap needs and schedule a professional replacement. Ensure your home is protected with expert services that focus on quality and durability. Let our team help you maintain a secure and effective roof with minimal disruption to your daily life.
Frequently Asked Questions
Got questions about your roof? We’ve got answers. From maintenance tips to insurance claims and repair timelines, our FAQ section covers the most common concerns homeowners have. Get informed and make confident decisions about protecting your home.
People Also Ask
Can ridge cap shingles be replaced without disturbing ridge vents or attic ventilation?
Yes. If the ridge vent system is in good condition and properly installed, ridge cap shingles can usually be replaced without altering the ventilation components. The existing vent remains in place while only the outer ridge cap materials are removed and reinstalled, provided the vent housing and fastening points are still intact and undamaged.
Are ridge cap shingles installed differently on hip roofs compared to straight ridges?
Yes. Hip ridges require a different layout sequence and direction of installation to maintain proper overlap and water shedding. While the fastening principles are similar, hip applications often involve shorter shingle segments, more frequent alignment checks, and different termination details where multiple ridges intersect.
Do ridge cap shingles require different sealing methods in cold or high-wind climates?
In colder or high-wind regions, additional attention is given to fastening patterns and sealing points to reduce the risk of wind lift. This may include stricter adherence to manufacturer fastening locations and supplemental sealing at exposed transition points, while still following the same basic installation method.
Related Articles
-
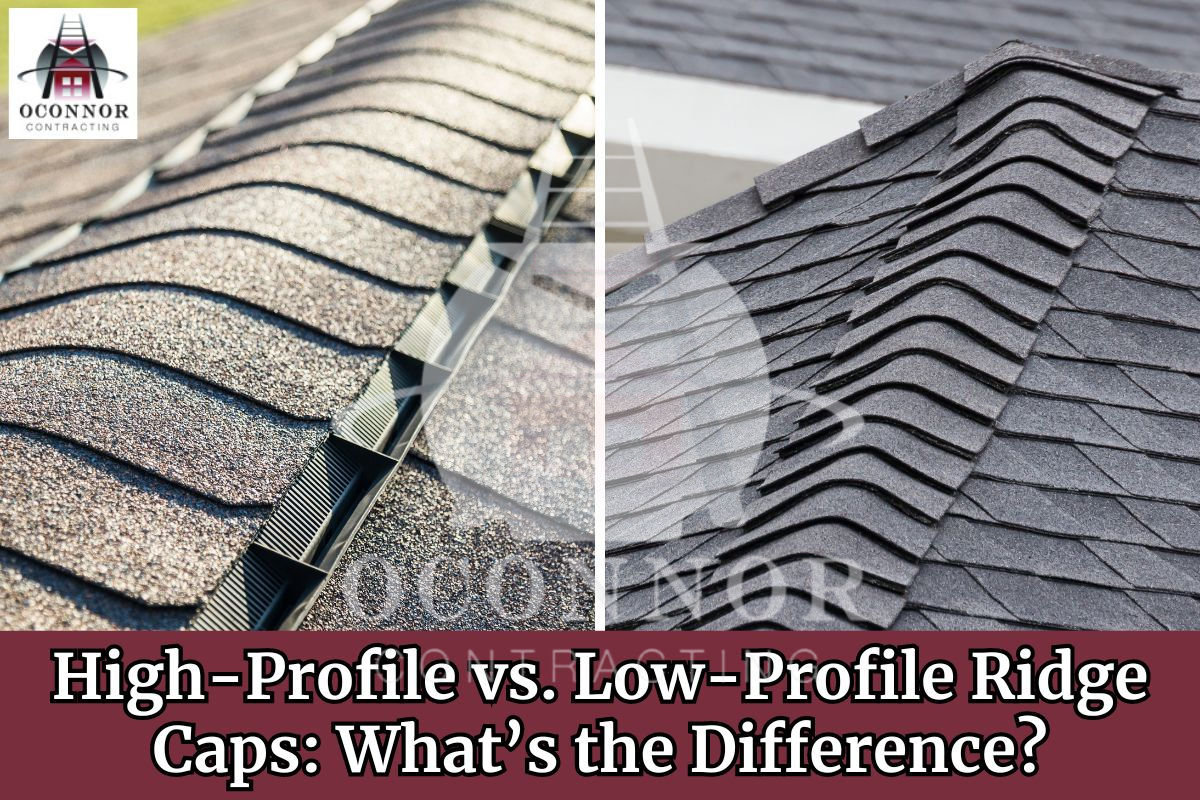 September 29, 2024High-Profile vs. Low-Profile Ridge Caps: What’s the Difference?Every little detail counts when it comes to roofing, even the ridge caps, which cover the topmost part of your roof. Ridge caps protect the highest part of your roof from weather elements and improve its appearance. Like most roofing products, they come in different variations, such as high-profile and low-profile options. The distinctions between […]
 -
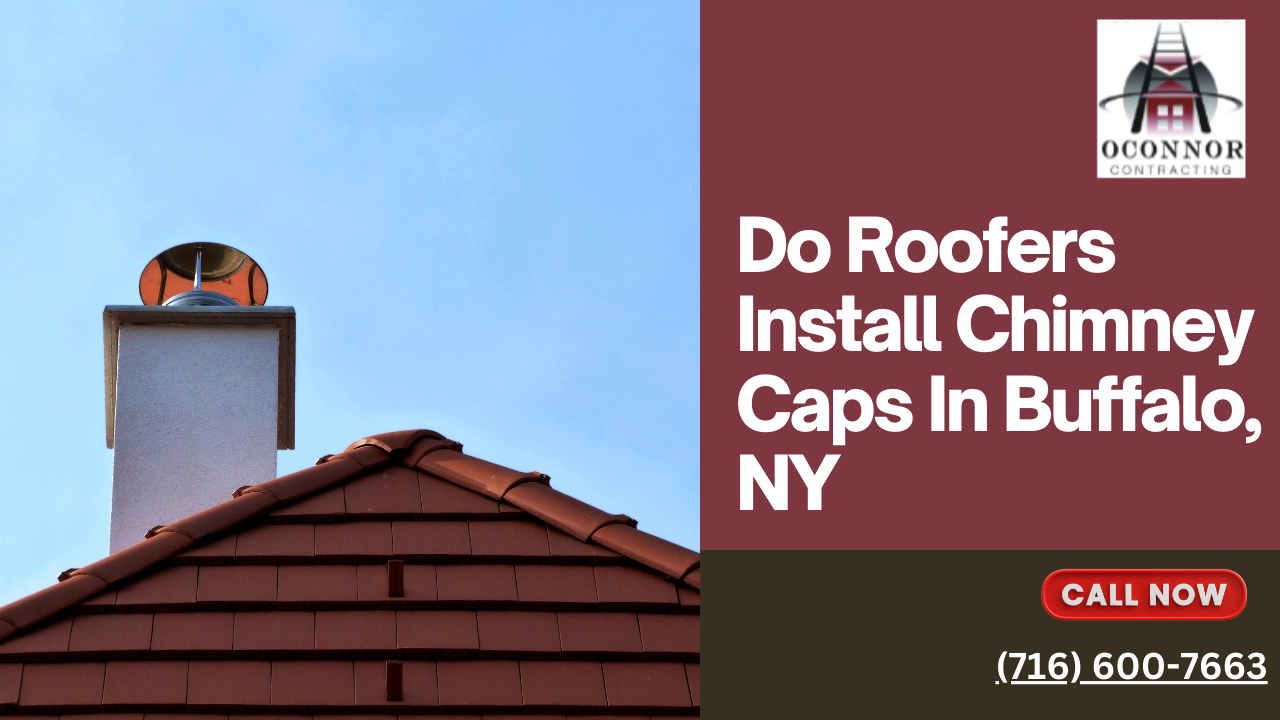 March 22, 2024Do Roofers Install Chimney Caps?A chimney cap, also known as a chimney cover, is a protective piece that is installed on top of a chimney. Since the chimney is installed on your roof you might be wondering, do roofers install chimney caps in Buffalo? Well, the answer is yes, some roofing contractors do install chimney caps. But are chimney […]
 -
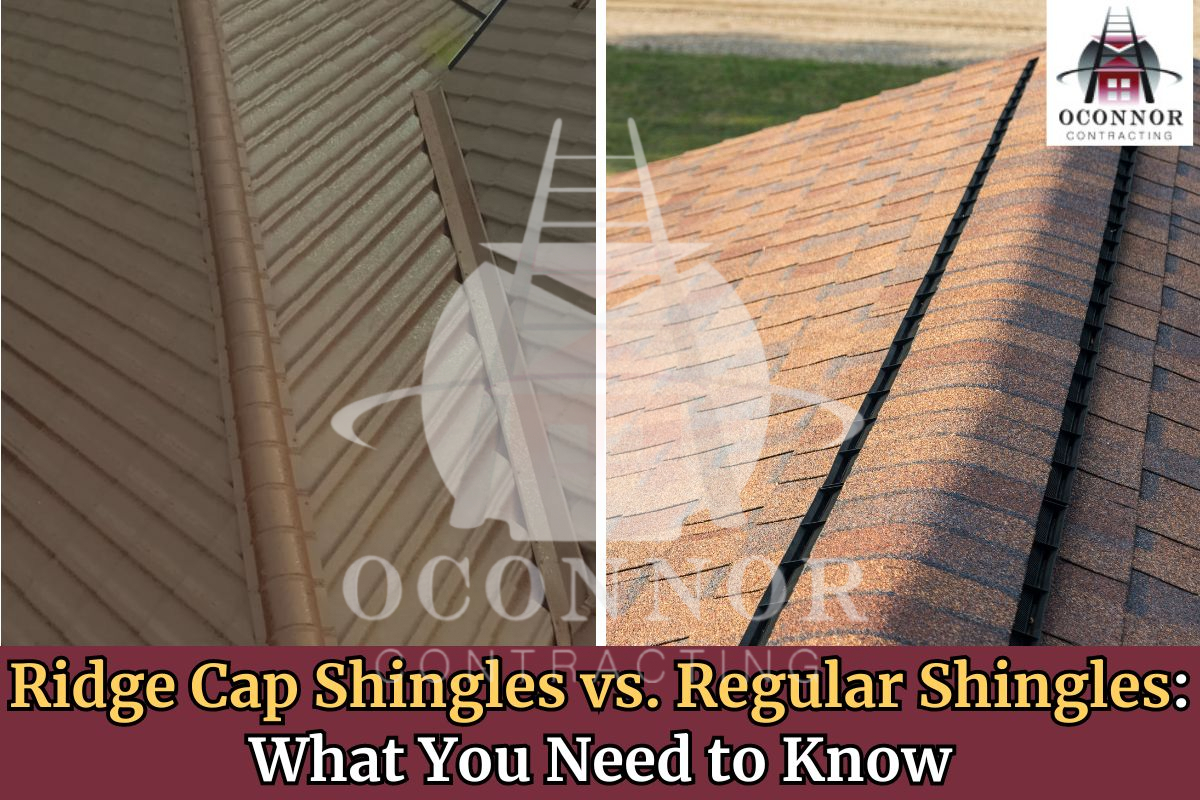 August 22, 2024Ridge Cap Shingles vs. Regular Shingles: What You Need to KnowOne of the most important parts of your home is the roof, which not only adds to the overall aesthetic appeal of your property but also shields you and your family from the weather. There are a few types of roofing shingles, including ridge cap shingles and regular shingles. Even though they both have vital […]
Protect Your Home with Expert Roofing
Don’t wait for leaks or storm damage to cause costly repairs. Our experienced roofing team provides fast, reliable service, high-quality materials, and lasting results. Ensure your home stays safe, secure, and looking great—contact us today for a free estimate.


